Japanese Dry Curry
Dry Curry is a no-gravy version of Japanese curry rice made with ground meat and minced vegetables and often topped with a fried egg. This homestyle meal is flavorful, gently spiced, and savory with a hint of sweetness from raisins. Although not a well-known dish outside of Japan, this quick and eas
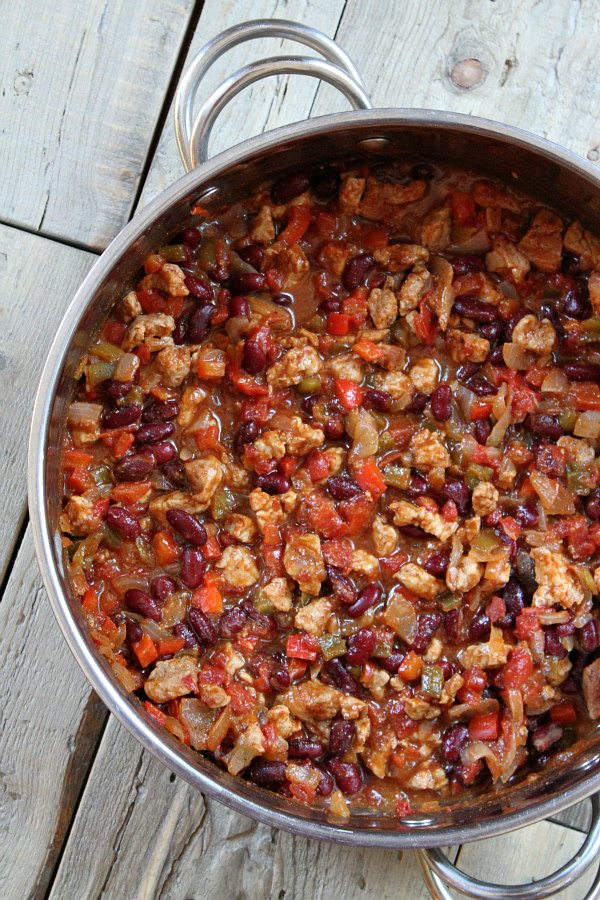
 Foto: Just One Cookbook
Ingredients
- ½ tsp ginger ((grated, with juice; from a 1-inch, 2.5-cm knob))
- 2 cloves garlic
- 1 onion ((11 oz, 312 g))
- ½ g reen bell pepper ((3 oz, 85 g))
- 4 oz carrot
- 3 sprigs parsley ((for garnish))
- 2 Tbsp neutral oil ((divided; for cooking the eggs and dry curry))
- 4 large eggs (50 g w/o shell) ((for the fried eggs; optional))
- ¾ lb ground beef and pork combination
- ½ tsp Diamond Crystal kosher salt
- ⅛ tsp freshly ground black pepper
- 1 Tbsp sake
- 3 Tbsp raisins ((1 oz))
- 1½ Tbsp Japanese curry powder
- ⅓ cup chicken stock/broth
- 1 Tbsp mirin
- 2 Tbsp Worcestershire sauce
- 1 Tbsp soy sauce
- 2 Tbsp ketchup ((I use ketchup without corn syrup))
- 1 Tbsp honey
Steps
Gather all the ingredients. Make sure the rice has finished cooking before preparing the dry curry. As I mentioned in the cooking tips section of the blog post, I recommend measuring all the condiments (from the chicken broth to the honey) and mixing them in a bowl before cooking.
Peel and grate the ginger (I use this grater) and measure ½ tsp ginger (grated, with juice). Mince or crush 2 cloves garlic (I use a garlic press).
Mince 1 onion finely: Cut the onion in half. Lay one half flat side down on the cutting board. With the knife edge toward the root end, make ⅛-inch horizontal slices, keeping the root intact. Then, with the knife tip pointing toward the root end, make ⅛-inch vertical slices to within ½ inch of the root end, again keeping the root intact.
Finally, make perpendicular cuts down through the vertical slices you made. Repeat with the other onion half. If the onions need to be chopped finer, you can run your knife through them using a rocking motion. Be sure to hold down the tip of the knife; otherwise, the onions will go flying around the room.
Cut ½ green bell pepper into thin strips. Then, mince the strips.
Cut 4 oz carrot into thin slabs, then into thin strips. Then, mince the strips.
Mince 3 sprigs parsley and set it aside for the garnish.
Heat a large frying pan over medium heat. Once it‘s hot, add 1 Tbsp of the 2 Tbsp neutral oil and evenly distribute it. Then, crack 4 large eggs (50 g w/o shell) into the frying pan (here, I made 2 fried eggs at a time; you may need to fry them in batches). Fry them on one side only, scooping the hot oil with a spoon and pouring it over the uncooked egg whites a few times. The hot oil will cook the whites faster and prevent the yolks from getting overcooked. When the whites are just set but the yolks are still soft and runny, transfer the eggs to a plate and set it aside. Tip: I prefer to fry my eggs sunny side up because the soft yolk adds a rich and creamy texture to the dry curry.
Heat the same large frying pan over medium heat. Once it‘s hot, add the remaining 1 Tbsp oil, evenly distribute it, and then add the onion.
Sauté the onion until golden brown and translucent, about 5–6 minutes.
Add ¾ lb ground beef and pork combination and season it with ½ tsp Diamond Crystal kosher salt and ⅛ tsp freshly ground black pepper. Stir to combine.
Add the ginger and garlic and stir until fragrant. Continue cooking, breaking up any clumps with the spatula, until the meat is no longer pink.
Add 1 Tbsp sake and mix well.
Add the carrot and bell pepper and combine well. Then, cover the pan with a lid and lower the stove‘s heat to medium low. Cook for 3 minutes. Tip: Make sure the lid is tight-fitting to preserve the cooking liquid and prevent evaporation, which may cause the food to burn on the bottom of the pan.
After 3 minutes, the vegetables will have released some of their moisture and should be slightly wilted. Next, add 1½ Tbsp Japanese curry powder and combine well with the vegetables.
Add the rest of the dry curry seasonings: ⅓ cup chicken stock/broth, 1 Tbsp mirin, 2 Tbsp Worcestershire sauce, 1 Tbsp soy sauce, 2 Tbsp ketchup, and 1 Tbsp honey.
Mix it all together. Add 3 Tbsp raisins and stir to incorporate.
Cover the frying pan again and cook on low heat for 4–5 minutes. Then, open the lid and taste the dry curry, adjusting the seasoning as needed. Tip: Make sure the lid is tight-fitting again! If you see the cooking liquid disappearing, add a small amount of water so you can cook for the entire 4–5 minutes.
Serve the steamed rice on individual plates and spoon the dry curry over the rice. Top with a fried egg (optional) and garnish with chopped parsley.
You can keep the leftovers in an airtight container and keep them for 3 days in the refrigerator or for up to a month in the freezer.


Loading comments...